
NEW Site
NEW Site
Paypal New
3 min read
Setup #
This is an updated version of the PayPal plugin. With the old version, users are directed away from Snappy Tickets to PayPal to complete their order and this does confuse people resulting in abandoned orders.
With this NEW paypal system, buyers enter their card details directly in the Snappy Checkout, just like they do for the Stripe gateway and the purchase is seamless and automatic.
The other good news is that the setup for the event manager is just a few simple button clicks via the automatic onboarding process, which is explained below.
To use this gateway you must have a business PayPal account, which is a free upgrade from the standard account.
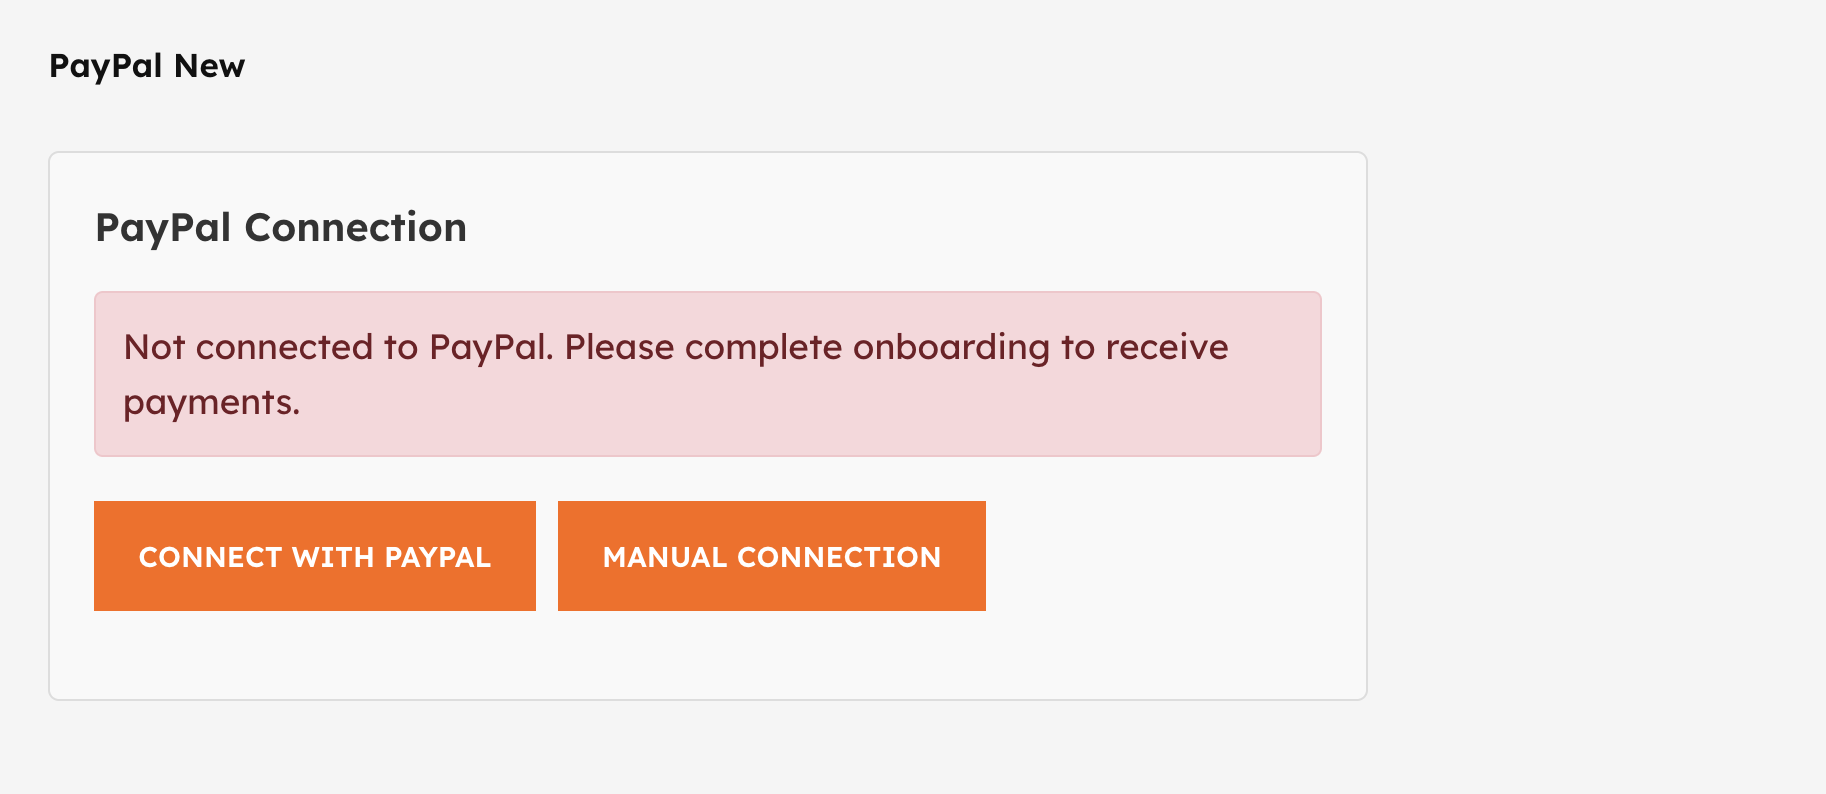
To enable PayPal New payments tick the PayPal New option and follow the instructions below..
Automatic Onboarding (Recommended) #
In order to connect your paypal account to Snappy Tickets follow these simple steps:
Step 1: Access the Onboarding Page
- Go to the Event Settings tab and enable PayPal New
- Look for “PayPal New” section
- Click the “CONNECT WITH PAYPAL” button for automatic connecting
- If the automatic connection doesn’t work you can use the manual connection method
Step 2: Connect to PayPal
- You’ll be redirected to PayPal’s secure login page
- Review and approve the permissions requested:
- Log in with your PayPal business account credentials
- Confirm the connection
Step 3: Complete Setup
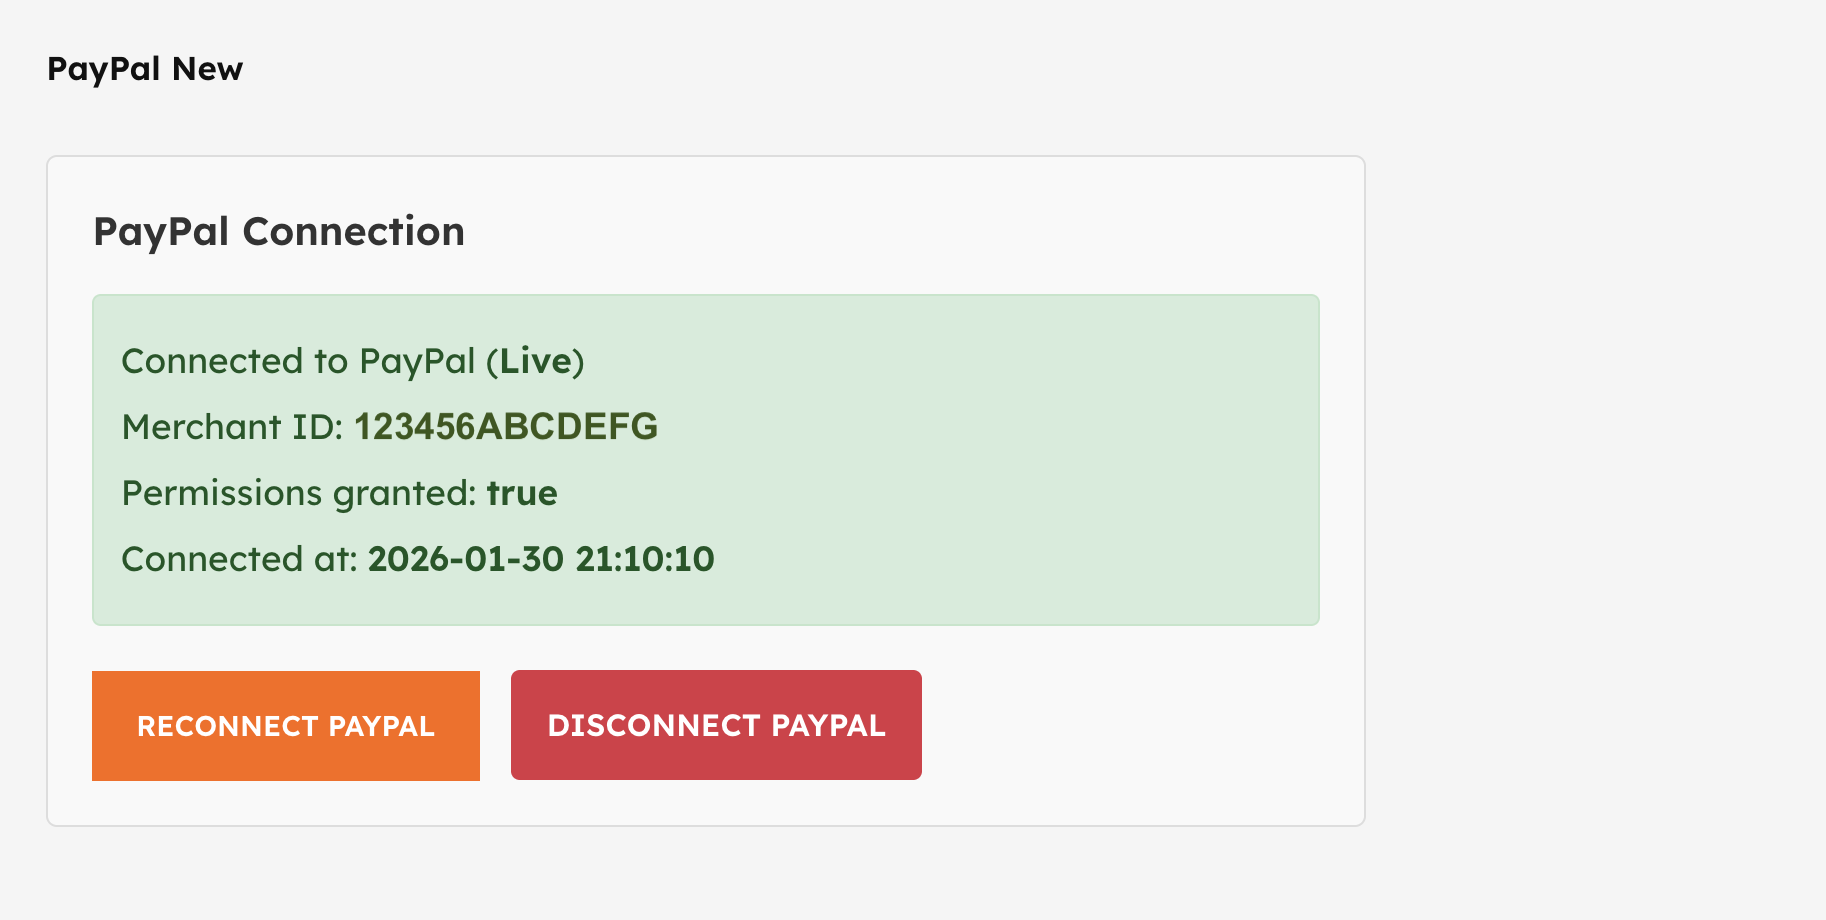
- You’ll be redirected back to the settings dashboard
- Your PayPal account is now connected and ready to receive payments
- A confirmation message will appear: “PayPal Account Connected”
Payments #
When a buyer pays via PayPal the order will complete immediately and payment will appear in your PayPal account straight away. There is no further admin for you to do. A completion confirmation email is sent to the buyer.
If you need to refund the payment then log into your PayPal account, find the order, and select the refund button. You will then need to find the order in the Snappy Tickets order table and set the status to cancelled.
Method 2: Manual Connection (if automatic connection fails) #
Use this method if you prefer to enter your PayPal API credentials directly or if automatic onboarding is unavailable.
Step 1: Get Your PayPal API Credentials
- Log in to your PayPal Business Account at [https://www.paypal.com](https://www.paypal.com)
- Navigate to **Account Settings** > **API credentials**
- Click **”Create App”** to generate new API credentials
Step 2: Configure Your App
- **App Name**: Enter a descriptive name (e.g., “Your Store Name – Payments”)
- **Feature Type**: Select “Accept payments”
- **Business Account**: Ensure your business account is selected
- Click **”Create App”**
Step 3: Find Your API Keys
After creating your app, you’ll see your API credentials:
Client ID
- Located in the “App credentials” section
- Starts with “A” followed by alphanumeric characters
- Example: ‘AaBbCcDdEeFfGgHhIiJjKkLlMmNnOoPpQqRrSsTtUuVvWwXxYyZz’
Client Secret
- Click **”Show”** or **”Generate”** next to Client Secret
- Copy the secret immediately – it’s only shown once
- Store it securely for your records
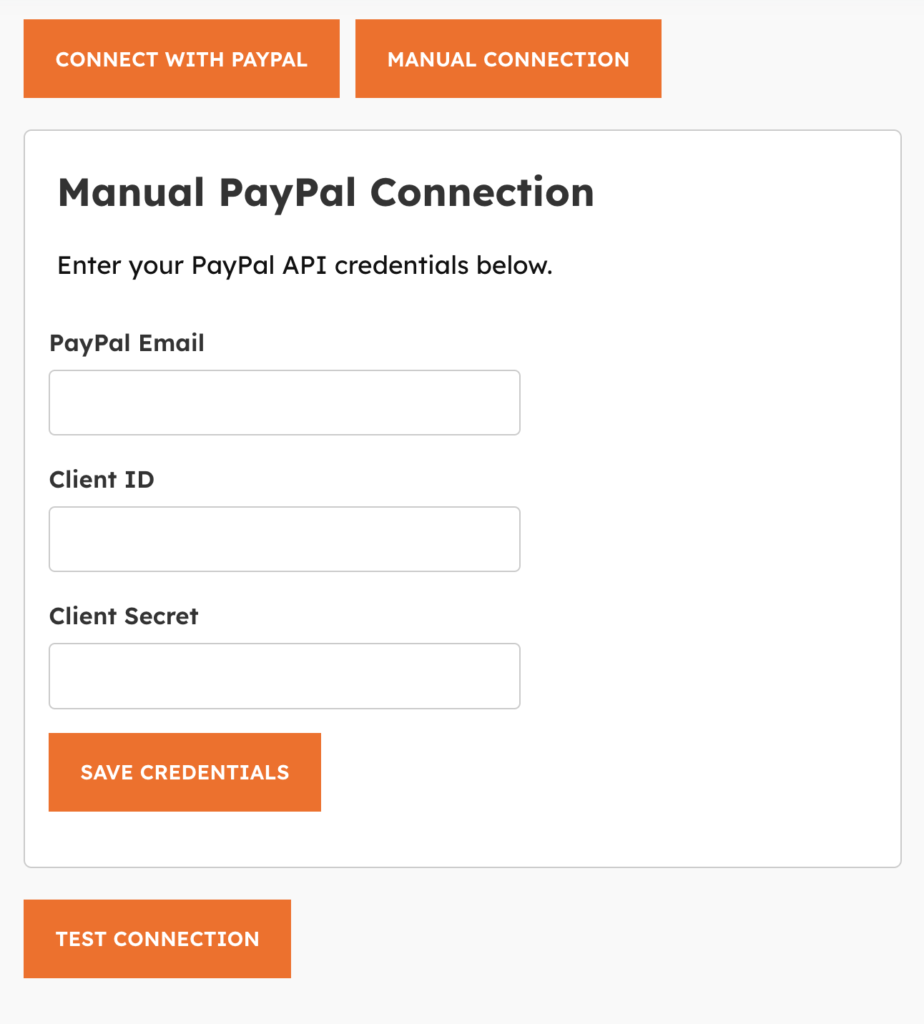
Step 4: Enter Credentials in Vendor Dashboard
- Return to your vendor dashboard
- Navigate to “PayPal New Settings”
- Select “Manual Connection”
- Enter the following:
Client ID**: Paste your PayPal Client ID
Client Secret: Paste your PayPal Client Secret
Email Address: Enter your Account Email Address - Click **”Save and Test Connection”**
Step 5: Verify Connection
- The system will test your credentials
- If successful, you’ll see: “PayPal connection verified successfully”
- If failed, double-check:
Client ID and Secret are correct
No extra spaces or characters
Your PayPal app is in production mode


Powered by BetterDocs