
Main Screen
This screen opens up when you click ‘Email Buyers‘ from the Dashboard. This allows you to easily send an email to everyone that has bought a ticket to your event.
All the email addresses will be pre-filled for you and the Subject line defaults to the name of the event. Just fill in the Message to complete the email setup.
You can modify any of the prefilled data and add / remove recipients in the recipient list. If adding to the recipient list you must follow the following format and separate recipients with a comma.
name1<email1>, name2<email2>
eg,
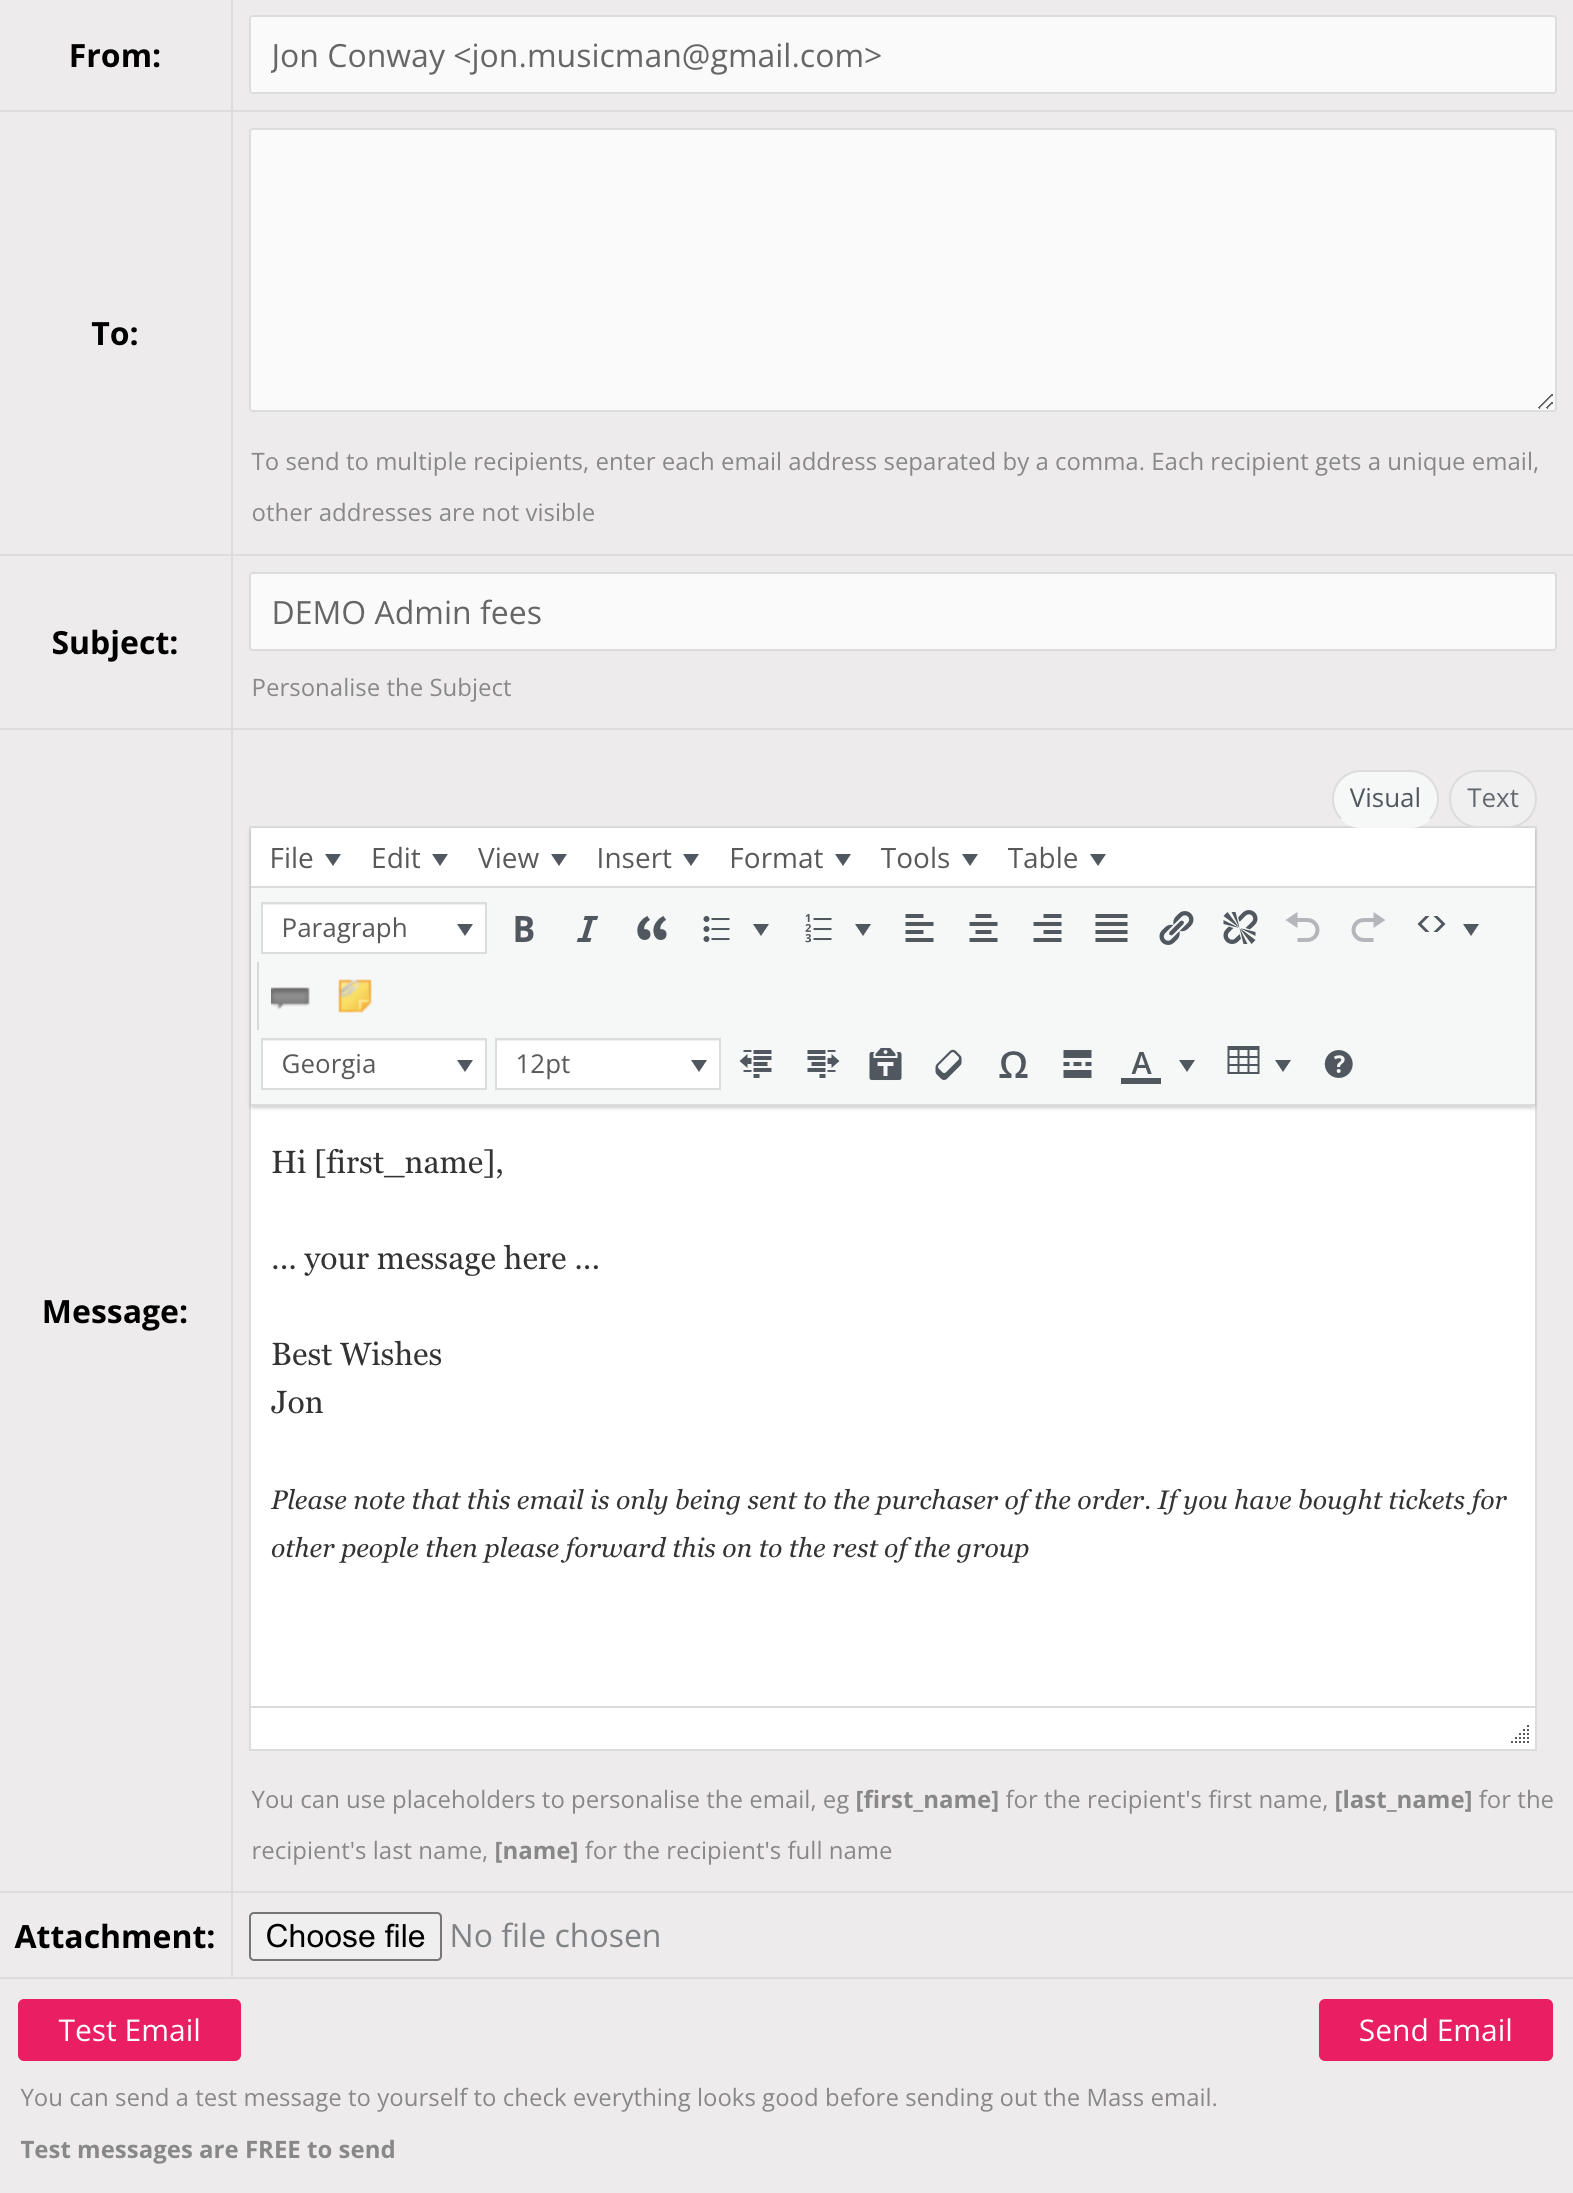
Jon Conway<jon.musicman@gmail.com>,
Snappy<info@snappytickets.co.uk>
Note: Only ticket buyers will receive this email. If they have purchased tickets for other people then the buyer will need to forward the email to them. This is because only the ticket buyer’s email can be guaranteed. For this reason, there is a note in the default message telling the recipient to forward it to everyone else they bought tickets for.
Here is the default email form that opens up (the To: field will be filled with the data from everyone that has bought a ticket to the event).
Default Settings
All the default settings are editable. These are the defaults.
| From: | The Organiser’s registered email address. When a recipient hits ‘reply’ to this email it will be sent to this address |
| To: | Auto populated with a list of all the buyers for this event. You can add or delete addresses in this list. |
| Subject: | The name of the Event |
| Message: | See above image |
Personalisation
Emails are sent individually to each recipient and can be personalised using the following placeholders:
- [first_name] to show the recipient’s first name
- [last_name] to show the recipient’s last name
- [name] to show the recipient’s full name
eg Hello [first_name] will be replaced with Hello Harry if being sent to Harry Potter.
The From: email address will be filled in from the organiser details and the signature will use the organiser’s name.
Before you send off your email you may want to send a test email to check for formatting problems. You do this by pressing the ‘Test Email’ button and the email will be sent to your registered email address. The email Subject: will be prepended with the word ‘TEST’ so you can easily see it in your inbox.
Once you’re happy with the email you can hit ‘Send Email’ to send it to the group.
Attachment
You can upload a single file attachment by clicking the ‘Choose file’ button. Note that, for security reasons, if you send a Test Email with a file attached, you will have to reselect it again when you wish to ‘Send Email’ to the group.
Costs
There is a small cost to use this feature as the more emails that get sent from the site the more it is charged by the Email service provider. Mass emails cost 1 credit for every 100 emails (recipients) sent out. Test emails are FREE to send.
Logs
Once the email has been sent it will be added to your email log which you can find in your dashboard. This will list the Event, Subject, Date and recipients for each email sent where you can view the email or delete it. You cannot modify a sent email, though you can copy it to be used for other emails.